Friday, August 30, 2013

What's In the Box: Island Model Works Nippon Sharyo South Shore/NICTD Coach

Just in from the mailbox is this resin cast Island Model Works Nippon Sharyo South Shore/NICTD coach.

I've been eyeballing this thing on the Island Model Works Web site for the past couple of years but I finally took the plunge and ordered it a few weeks ago. Shortly after paying for it online, Island Model Works sent an email saying, "We're making the kit for you now. We'll ship it as soon as it's ready in a week or two." It arrived exactly two weeks later.
From top to bottom: Island Model Works Decals (old and news styles); a Walthers/Life-Like RDC which will provide drive and lighting board; the main body shell; floor/underbody; truck and bolster adaptation parts; clear and tinted window glazing.
The prototype for this particular model is a late/contemporary version of the Nippon Sharyo (sometimes called Sumitomo) coaches delivered to the South Shore first in the early 80s. Nickel Plate Products imported a small run of HO Nippon Sharyo cars in plated brass sometime in the early to mid 80s. The silver Nickel Plate Products cars are rare and expensive models, so IMW's offering fills an important gap for modelers of the post-orange car South Shore.

The IMW kit represents a car that has been brought up to the late/contemporary standard, which is to say it does not have the large white circuit breaker box on the roof between one of the pantographs and the center of the car, or lettering boards above the windows.  If you're looking to backdate the cars as they appeared in the 80s and 90s, they will need to have these rather prominent details added back on--.005" or .010" styrene ought to do the trick for the lettering boards, and fabricating a streamlined circuit breaker box with styrene sheet shouldn't be too taxing for anyone already tucking into a relatively challenging resin kit like this.

And building this kit will be challenging. The parts are well molded and engineered, but have flaws that will need to filed, sanded, and occasionally filled or replaced--all of which is more or less normal with kits produced in this medium, regardless of subject. 

I have been building resin models for over 20 years now--mostly military and sci-fi models--and can report that this kit is in really good condition right out of the box. The parts are straight and square and there are virtually no pinholes or bubbles in the resin.  Where there are flaws in the molding, they are found mostly around the edges where the parts were separated from their molds.  Most of this can filed and/or sanded smooth, with a minimum of additional filling and smoothing.

Some details are soft or heavy.  The ends have simplified details, particularly the headlights that likely can be improved with some diesel detail parts and good lenses. The 'gong'-type bells on each end are likely to be replaced with Details West parts, and the diaphragms might need some detailing out as well.  The steps are a bit heavy and rough, and if they don't clean up well with sanding and filing, they may be rebuilt with thin styrene or brass.  Handrails and grab irons are molded on, but can be easily removed and replaced with brass wire.

The kit is intended to be enhanced with components furnished by the builder.  The kit is not powered, and does not include instructions, couplers, wheel sets,  or pantographs. IMW does offer separately two different decal sets for this model--the older style with broad orange window stripes, and the newer style with a skinny window stripe.  I ordered both, because I'm indecisive.

The IMW Web site suggests Sommerfeldt 968 pantographs and drive components from the Proto 1000 Budd RDC or the Northwest Shortline Stanton power truck. The floor appears to have holes and slots ready to accept trucks and motor from the Proto 1000 RDC.  Additional bolsters intended to accommodate dummy trucks are included, as well as a stout bolster with an offset that appears to my eye to be an adapter for the NWSL Stanton power truck.

As indicated in the photo, I've rustled up a Walthers Proto 1000 RDC (one of the later DCC ready variety), from which I intend to extract not only the motor and trucks, but also the circuit board. The RDC drive is a real gem, and I especially appreciate that there is a flywheel. The circuit board provides a DCC socket as well as pretty good lighting.  However, I am somewhat concerned about the mechanical properties of the resin--will those curved slots, floor holes, and motor mounts stand up to the weight and torque of the finished car?  

Speaking of weight, I am concerned about adequately weighting the car while also adding the requisite stiffness to that floor--am thinking that a steel weight from an 87' high cube box car might be a good starting point. Meanwhile, an ambitious modeler with machine tools at the ready might even want to consider major milling surgery on the metal Proto 1000 RDC frame to remove all of that diesel underbody detail and and modify the frame ends and above-floor portions to fit the IMW pilots and body shell.

Does this all sound like a lot of work? Maybe, but this level of effort harks back to 30 or 40 years ago when there were still old-school craftsman-style kits to be had.  As late as the early 80s the Walthers catalog showed pages  and pages of heavyweight passenger, North Shore, and Pennsy MP54 'craftsman' kits that featured wooden floors and rooves, soft metal ends, and stamped metal sides--and if pre-streamline passenger, traction, and electrics were your thing, this is how you built out your rolling stock roster. 

This kind of resin kit is, in my estimation, a modern-day craftsman kit. When I started in model railroading in the late 70s, those old craftsman kits were what I aspired to and expected to build after I 'arrived' as a model railroader. It's only fitting that I'm excited about building the 21st century answer to those old kits.

Monday, August 26, 2013

Free-Mo Compatibility for Edge-of-Layout Transition Tracks

Something that's been bugging me for a while has been how the track ends at the edge of the Dunes Junction layout. I had left 1 1/2" of space at the end of the roadbed, into which I had fitted removable lengths of Atlas code 83 section track with a styrene sheet underlay and ballast, with the idea that this gap at each end could easily accommodate transition tracks for staging cassettes or more layout.

Coincidentally, I had been reading up on Free-Mo HO module standards, and a more elegant-looking and mechanically sound transition track idea presented itself: BNM Hobbies printed circuit board tie plates. These tie plates have ties milled into half or so of the ties, with copper soldering pads in place of tie plates.  The other half or so have a channel milled out to accommodate a transition rail fitted with a joiner. The idea here is to use a length of rail to join modules or sections together.
The BNM PC Board tie plate: solder pads for rail on the left in this photo, and a milled-out trench for transition rails on the right.
The completed Tie Plates, ballasted and weathered in. The 1/2" lengths of rail can be easily removed if and when I expand the layout or add staging tracks. 


Tuesday, August 20, 2013

Inspiration Photos: Looking Up and Seeing Your Model Railroading Goals

Put up some prints of South Shore scenes and details--nothing too fancy--that help me visualize what's going on at Dunes Junction, and also give visitors a sense of the 'vision' of the layout . . .

Saturday, August 17, 2013

Finishing Touches for the Mineral Springs Road Flag Stop

Here are two views of the more-or-less complete flag stop at Mineral Springs Road.  The shelter is scratchbuilt from Evergreen styrene siding and strips, with a photo-printed tar paper roof. The public phone is straight off the sprue from Walthers Cornerstone detail set. The guard rail posts are cut from Code 70 rail, and a Blair Line stop sign was the last bit added.


Wednesday, August 14, 2013

Everything You Ever Need to Know About Beer and Trains

Long-time and/or sharp-eyed readers of Up Dunes Junction have probably figured out that hand-made beer is the other great passion of my life.  Go check out this post at John Longhurst's CP Rail Manitoba & Minnesota Subdivision blog, which features his awesome layout and musings about things like beer and trains.

Sunday, August 11, 2013

Catenary Pole Plantin' Progress Program

We've been planting painted Model Memories catenary poles at Dunes Junction. Here's a look at the tools, techniques, and some lessons learned from our pole planting experiences.

Drilling jigs cut from hardwood ready for action. Note the rail alignment lines on the jig
to the left. The 30-degree mitre cuts on the allow the jig to be placed into tight spots,
which resulted from my poor planning of road, structure, and catenary pole placement.
Positioning a drilling jig.  The pushpin on the left marks the spot. A #8
sheet metal screw and a fender washer secure the drilling jig
The drilling jig fixed into place for drilling. The DeWalt right angle adapter
is not only compact, but also allows quick changes between drill and screw-
driving bits.

Adjusting the poles before the 5-Minute Epoxy sets. The
gauge at right ensures a uniform height of 3 3/4". The square
in foreground is essential to ensuring the the poles are set
straight and square.

Poles fitted and epoxied into place. Note the two squares in the foreground.

Unintended consequences: the drill sucked
up Heki and Silflor fibers and jammed the bit,
which needed to be cleared with an X-Acto knife. 


Sunday, August 4, 2013

Video of Amtrak ACS-64 Testing at the Pueblo Test Track

Feast your eyes: the new Amtrak electric at speed at the Federal Railway Administration's test track in Pueblo, Colorado . . .

Saturday, August 3, 2013

Pole Paintin' Progress

Check these out . . . getting done with the painting of the South Shore lattice catenary span bridges. Can hardly wait to install these . . .
Base coats of Floquil Grimy Black (cross arms) and Rail Brown (poles) . . .

. . . And with some raw umber washes and yellow ochre dry brushing.

Tuesday, July 30, 2013

Gettin' Jiggy with HO Catenary Construction

Jigs and holders and gauges and whatnot are necessities for catenary construction. That thing with the plastic strip is a pole height gauge. The plain block is a wire height block/gauge thingy. The flat one on the track is a drilling jig that (hopefully) will guide correctly spaced and square mounting holes. The styrene sheet nestles the jig into the gauge of the track; the gauge will be held in place temporarily with a screw during drilling.

Tuesday, July 23, 2013

Cleanin' and Primin' Model Memories South Shore Catenary Span Bridges

The span bridges all primed with Rustoleum metal primer, which will dry for a week or two before further painting.  Hats off again to Oberleitungsbaumeister Don Silberbauer of Model Memories for producing these showpieces--
the bridges looked great in bare brass but they look even closer to real with this first coat of paint. The etched
brass lattice is truly delicate-looking, but still quite sturdy.
Model Memories South Shore Catenary Span Bridges prepped for painting. They were thoroughly
rubbed down with a wire brush, then with steel wool, and finally wiped down with denatured alcohol


Monday, July 22, 2013

South Shore Catenary Construction First Steps--Woo Hoo!

Siting the Model Memories catenary span bridges--the first step of many in my catenary construction adventure! One lesson learned here is to plan better, because it was starting to look like the grade crossing and Mineral Springs flag stop might need to be rearranged (as in torn out and rebuilt). but I think I worked it out so that the flag stop will actually look more interesting , with a pole right there by the shelter.

Sunday, July 21, 2013

Workbench in a Rare State of Grace

Flag stop accoutrements almost ready for final installation at Mineral Springs Road on my cleaned-up workbench. If this blog had smell-o-vision capability, you'd be catching the sweet whiff of turpentine, as there was just some dry-brushing with artists' oils and subsequent paintbrush cleaning going on here.  Coffee in a Star Wars cup is a vital part of my pre-noon model railroading activity.  Porter (the beer, not the tiny steam locomotive) in a tumbler helps out with post-noon model railroading .

Thursday, July 18, 2013

Flag Stop Progress is Progressing

The Dunes Junction flag stop is coming right along. From left to right: the a-building flag stop shelter, scratchbuilt from styrene and temporarily held together with drafting tape; a painted and decaled Walthers Cornerstone public telephone held in the clutches of a clothespin; and guard posts fashioned from Code 70 rail and painted an awesome shade of dull orange from a Liquitex spray can. Good times!


Tuesday, July 9, 2013

Grade Crossing Progress

Mostly finished and scenicked in. I built some footings
 for the crossbucks  from styrene, which I then painted with
Floquil concrete. Aleene's Tacky Glue holds the crossbucks
 down on the footings.
Over the recent long holiday weekend, I was able to nearly complete the Mineral Springs Road grade crossing. The road and wood crossing had been completed for some time, but was missing crossbucks.

I decided to try my hand at some lighting effects to add a visual action to the scene. Busch 5934 US Crossing Signals had the look and the price I was looking for, plus they were 'ready-to-run' with a flasher circuit included in the package.

The Busch signals are pre-wired with hair-like magnet wire, and the circuit is in very small case around the size of large ice cube. Two leads connect to a 12-24v AC or DC power source.  The magnet wire terminates into the circuit via binding posts that are secured by press-fit plastic pegs. Have never seen anything like this, but they work.

I like to test electrical things, and re-test them, and then test them again during all stages of construction and installation. I test-ran the circuit and crossbucks off an old analog power pack, and ultimately acquired a Radio Shack Enercell 15V wall wart power supply, which will now serve as accessory power for the whole layout. These Enercell wall warts can be equipped with a variety of tips, including a plain old set of test leads, but I chose an actual plug-and-socket arrangement that can break away easily when moving the layout .

The flashing crossbucks are controlled via a miniature SPDT switch mounted to the front of layout adjacent to the road. I considered but rejected a detector circuit (too expensive, too hard to install at my current stage of completion, and probably would be annoying on such a small layout) and DCC stationary control (too expensive and kind of complicated compared to direct control via a cheap and simple ol' switch).  I wired it all up to easily accommodate an ITT crossing bell sound module, which will go in over the coming weeks.
The crossbuck flasher circuit from below. At upper left, the SPDT control switch. The black doo-dad with three yellow binding posts is the Busch flasher circuit; barely visible wisps are the magnet wire leads for the crossbucks. At the rear left is the terminal strip for the installation, which is ready to accommodate the addition of a sound module. Left of the orange spring clamps is the socket for the type 'N' plug fitted to the Enercell wall wart on the bottom right.  A cheap AA battery-powered headlamp was essential for me to see and complete all under-layout wire terminations.

Sunday, July 7, 2013

Fresh Images From Rick Abrams' Awesome New Haven Under Wire

Go over to Model Railroad Hobbyist magazine's blog community and check out new shots of Rick Abrams' electrified New Haven layout--make sure to check out the comments to get the whole schmear.

Rick's work demonstrates what can be done with state-of-the-art heavy electric modeling--always a pleasure to see this awesome depiction of the heyday of New Haven electric operations.

Sunday, June 30, 2013

Trains I've Seen Lately, Summer 2013 Edition

June has already turned out to be a busy month with travel and work, but trains keep turning up, no matter where we go.  We hiked the Inca Trail in from the outskirts of Cuzco, Peru to reach the breathtaking Macchu Pichu ruins, and then took the 3-foot modern narrow gauge PeruRail back to Cuzco to fly back home.  Back down closer to sea level (and home), some snaps of CSX mainline action from the parking deck in Gaithersburg, Maryland.

Rails through the Inca Empire: A three-foot gauge PeruRail passenger train gets ready to depart Aguas Caliente, Peru, for Cuzco.  Aguas Caliente is the rail and road hub to reach Macchu Pichu and other Inca Trail ruins. Note the soaring, vertical terrain in the background. 


All of the PeruRail rolling stock, right-of-way, and facilities we saw evidenced a well-run, modern operation. These spiffy diesel railbuses provide local service primarily to Peruvians who work in the region's booming tourism industry. Inspiring scenery, short trains, dense operations, a mix of Euro and North American equipment: seems like an awesome modeling opportunity . . . 


Back at sea level, TOFC action in Gaithersburg, Maryland.


A long train of empty auto racks westbound through Gaithersburg.

Hot double-stack, eastbound through Gaithersburg.


Saturday, June 1, 2013

NJ Transit Snaps From the Cheap Bus Window

Spotted from the window of the cheap bus from New York to Washington ($25 each way + Internet bandwidth enough to post this). Taken this trip many times, and still find this vista of New York and New Jersey as breathtaking as anything in the Western states. What an awesome country!

Saturday, May 18, 2013

Side Project: Quick n' Cheap HO Automobiles

With all this scenery and road building going on at Dunes Junction, I took on a side project to bring some more man-made visual features into view.  My 70s and 80s era layout could use some 70s and 80s era heaps and rustbuckets to stay on theme--Northwest Indiana is the rust belt, after all--so I dug into my backlog of projects to get a few quick n' cheap vehicles into the rotation on the layout.

The starting point for this little side project is the Motor Max Forgotten Classics Six-Pack. I stumbled upon this inexpensive little gem of set for cheap a year or so ago at Engine House Hobbies in nearby Gaithersburg, Maryland.

This die-cast set is a virtual who's who of completely forgettable 70s and 80s US-badged jalopies--
Motor Max Forgotten Classics Six-Pack. What a bargain!
and just the kind of workaday visual cues of a place and an era that puts Dunes Junction in Carter/Reagan-era Indiana. Back in those days, there was a strong 'Buy American' theme to auto-buying trends in the region, tied to the declining steel and heavy manufacturing economy--so these and similar cars are evident in photos of the South Shore from that period.

The set includes a '74 Gremlin and '77 Pacer, both made by the now-defunct AMC, which coincidentally operated a plant in South Bend, Indiana; and four Ford products, including a '77 Pinto custom wagon, an '81 Escort, an '84 Tempo, and '75 Mercury Bobcat (a 'luxury' Pinto).

The lineup.
Out of the package, they would be acceptable 'background' models, but they are too chrome-y and too shiny. To get them ready for the layout, I needed to kill the shine and emphasize the excellent detail with paint effects.

I started by dissassembling them to simplify the paint effects and endullenation process. All but the Gremlin can be disassembled by removing the small screws that hold the die-cast bodies to the plastic chassis tubs; the Gremlin is riveted so I took other steps later in the process.

The paint effect is scandalously simple: a 'sludge wash' of acrylic paint, water, and dish soap. wiped off when dry. It's an old airplane modeling trick used to accentuate panel lines.  Fine Scale Modeler, sister publication of Model Railroader offers an awesome explanation of the technique. Once the sludge wash is dry, it gets wiped off with a tissue or cotton swab, leaving neatly accentuated recessed details. I applied the wash to panel and door lines, as well as chrome wheels and grills.

On the move. I think Wayne and Garth might be in that Pacer . . .
Good old Testors Dullcote comes next. Dullcote will fog up any clear parts--so I only applied it to the die-cast car bodies and the wheels. For an old or weathered vehicle, this might be desirable--I've seen a neat windshield wiper effect done with a semicircle-shaped bit of masking tape. I was too lazy to un-rivet the Gremlin, so I masked its windows with bits of damp tissue pushed into place with a tooth pick.
Indiana license plates only on the rear back then. The custom Pinto wagon (my least favorite vehicle of the lot) got Illinois plates, which are the customary front-and-back

After the Dullcote dried overnight, I reassembled the autos. A final finishing touch: era-specific license plates. I found some license plate images on Google and reduced them to HO using Photoshop, then printed them, cut them out, and glued them on. This detail fills in an important visual gap and ties the cars to the era and place of Dunes Junction.

Have a look and see what you think . . .


Wednesday, May 15, 2013

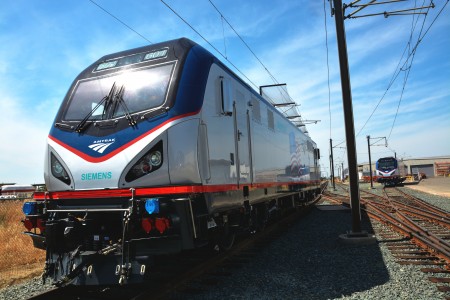
Amtrak's New ACS-64 Electrics Are In The House

From the Amtrak blog comes photos of new ACS-64 electric locomotives.
ACS-64s under wire (natch!) Photo: http://blog.amtrak.com/

They look so smooth and European!

We thought the same thing about AEM-7s back in the 80s, but they turned out to be kinda butch-looking, even Millenium Falcon-like, what with all those grab irons and other knobly appurtenances and such.

Feast your eyes, but don't hesitate to click through to Amtrak to see more 21st century electric loco goodness!

More photos below, courtesy of Boston Herald/AP:
Side view. Apparently these photos were taken at the Siemens Mobility plant in Sacramento, CA.
Photo: Boston Herald/AP  
Pans down in the shop. Wonder if those skimpy little pilots will get beefed up?
Photo: Boston Herald/AP  


Tuesday, May 14, 2013

Completing the Highway Bridge

The highway bridge is complete: it has been weathered and blended into the scenery. It's mostly Silflor tufts and Woodland scenics foam clumps, held down with Aleene's Tacky Glue. The Rix highway guardrail was painted with flat gray spray enamel and then washed and drybrushed.

The scrubby, skanky, nasty under-the-bridge area: cinders, dirt, foam clumps, and weed tufts. Wish I could figure out a hygienic way to do 'smell-o-vision' complete with wet cement-y and creosote essences. I love the smell of trains in the morning!  

Monday, May 13, 2013

Dan D. Sparks: Bloggin' Traction Modeling in Style, As Usual

Every Dan D. Sparks post is a must-stop-and-read treat! He's reporting here on his overhead pole construction progress.  Hope to be doing the same on the Dunes Junction by summer's end.
"Dan D. Sparks: Can't See the Layout for the Poles!" http://feedly.com/k/18FhdTF

Saturday, May 11, 2013

Running a Train Through Dunes Junction, Just Because

Took a break from scenery making to run a train through Dunes Junction and test out video capabilities of my Samsung TL500 point and shoot. Sometimes, you've just gotta run a train . . .

Sunday, May 5, 2013

There's (Progress On) That Confounded Bridge

The highway bridge, weathered with a wash of lamp black and raw umber oil paint, followed by successively lighter dry brushings of raw umber and titanium white, and finally with straight titanium white.  Like the purple bath towel? Well, I like it a lot better than the visually distracting open studs, cinder block wall, and file cabinet that it's covering up! Maybe it's time to get a mirror or curtain in to that space.
Progress toward completion of the 'behind the tracks' area of Dunes Junction continues apace. I want catenary so bad I can taste it!

The focus of the past few days has been that confounded bridge over which US 20 or US 12 (both Indiana Duneland highways that alternately cross or parallel the South Shore between Gary and Michigan City, Indiana).

We built and painted the highway overpass back in late 2011, so now we've got it worked in to the scenery and weathered it.  Next up is a guardrail fitted to the road grade up to the bridge. Once the guard rail is in: finishing touches to the ground cover and weedage. Stay tuned for progress.
Here's the Pikestuff guardrail being formed into the correct curve for the grade up to the bridge. I held the pad of graph paper up to the bridge and traced the curve, then taped the sections of Pikestuff guardrails to that curve. With a little filing of each section, they can be formed into the curve and then cemented with liquid styrene cement. Next time, we'll attach posts and paint and install the guardrail, along with completing the scenery around the bridge.

Wednesday, May 1, 2013

Scenery Progress: The Weedage on the Other Side of the Tracks

The past week or so has seen a lot of scenery progress at Dunes Junction. Trevor over at the Port Rowan S Scale blog has been blogging about his scenery progress and the instant gratification of scenery building, which has played a small role in prompting me to get my landscape freak on here a Dunes Junction.  Real life has also made some room in its schedule for Dunes Junction, too.

Over the coming months, I am hoping to get all of the area between the backdrop and the mainline scenicked and detailed with various man-made details like the flagstop and the highway bridge. Why? Cuz we're going to put in catenary, which will essentially block off all that real estate.
That's a paper mockup of the flagstop shelter. A scratchbuilt model will replace it, and will be joined by other odds and ends such as a pay phone, guard rails, and a flashing crossbuck. Note the 'before and after' on each side of the tracks.

Looking northeast across the spur at the 'field' between the Mineral Springs Road flag stop and the Highway 20/12 over pass. Note the difference in texture between the completed area on the other side of the tracks and foreground.  The foreground grass and weedage will go in after the installation of catenary span bridges and wire.
Ah, yes, the scrubby weedage of Northwest Indiana. In addition to a presentable flag stop shelter, I need to get to a photo in that blank spot at the end of the road.


Thursday, April 18, 2013

Experimenting With Weed(s)

It's been a while since I've posted any Dunes Junction progress, but here's some scenery experimentation that's been going on. I've been trying some combinations of Heki grass mats and Silfor weed tufts. So far so good: lots of straight up white glue (Elmers and Aleen's Tacky) and t-pins to hold things down while the glue dries seem to be the keys to success.